6. Transform the Data
Goal: Remove unused columns and create a state short-name column.
Do these steps in the Power Query Editor.
Part A: Remove unused columns
Step 1: Remove one column
- Click the Location table in the Queries panel.
- Scroll to the right. Find the Time Zone column.
- Right-click the column header.
- Click Remove.
The step Removed Columns appears in the Applied Steps list.
Step 2: Remove many columns at one time
- Hold Ctrl and click each column header you want to remove.
- Right-click one selected header.
- Click Remove Columns.
Keep the population column
Keep the Population column. You need it later for the map visual.
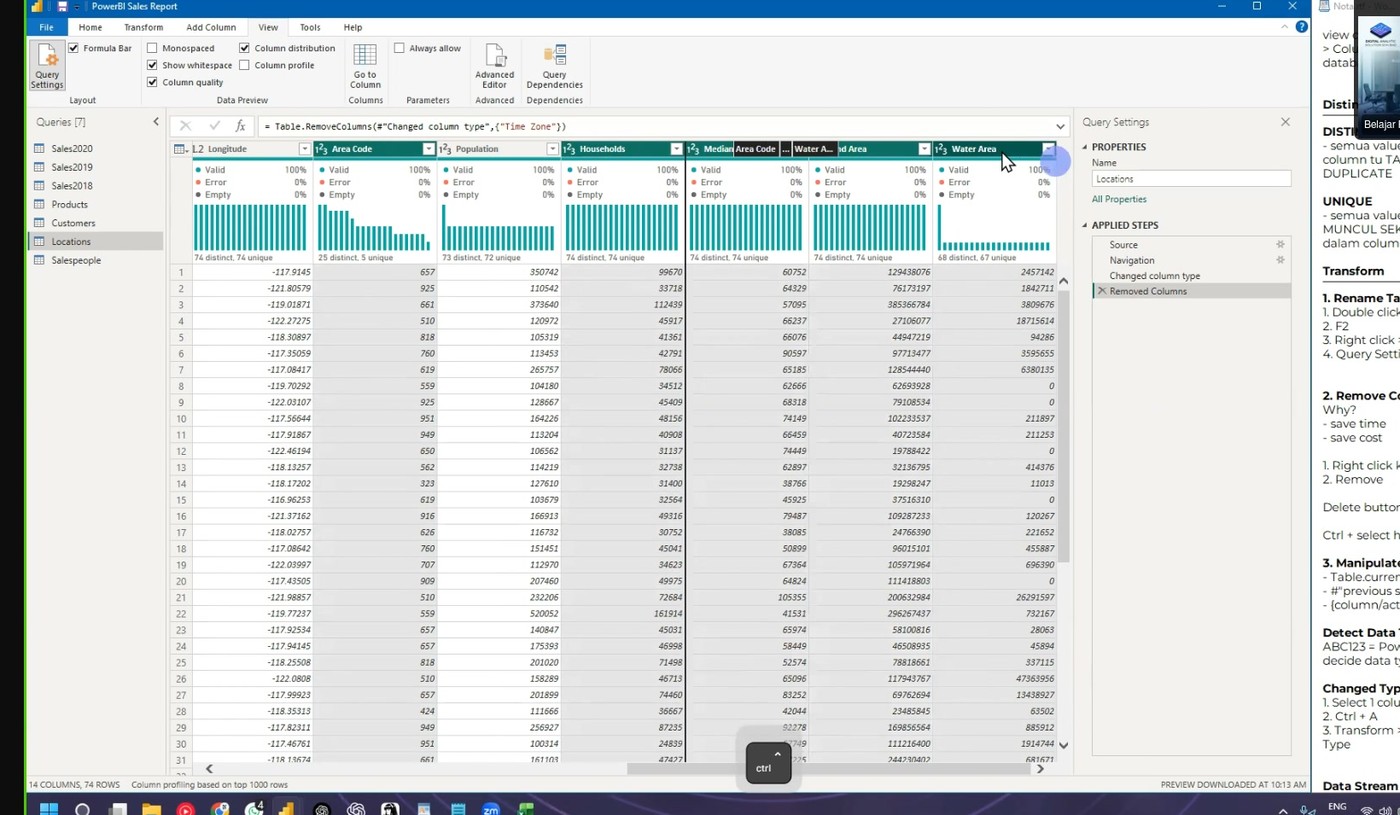 The removed columns are recorded in the Applied Steps list.
Step 3: If you remove a column by mistake
- Click the x next to the step in Applied Steps.
- The step is deleted. The column comes back.
No Ctrl+Z
Power Query has no undo key. To fix a mistake, delete or edit the step in the Applied Steps list.
Part B: Read the M code
- Click a step in Applied Steps.
- Look at the formula bar. The code has three parts:
- the current step
- the reference to the previous step
- the action
Example:
= Table.RemoveColumns(#"Changed Type", {"Time Zone", "Location"})
The # symbol means "this name refers to the previous step".
Part C: Create the state short name column
The goal of this exercise: change California into CALI.
Step 1: Transform to uppercase (practice)
- Click the State column header.
- Click Transform in the ribbon.
- Click Format > UPPERCASE.
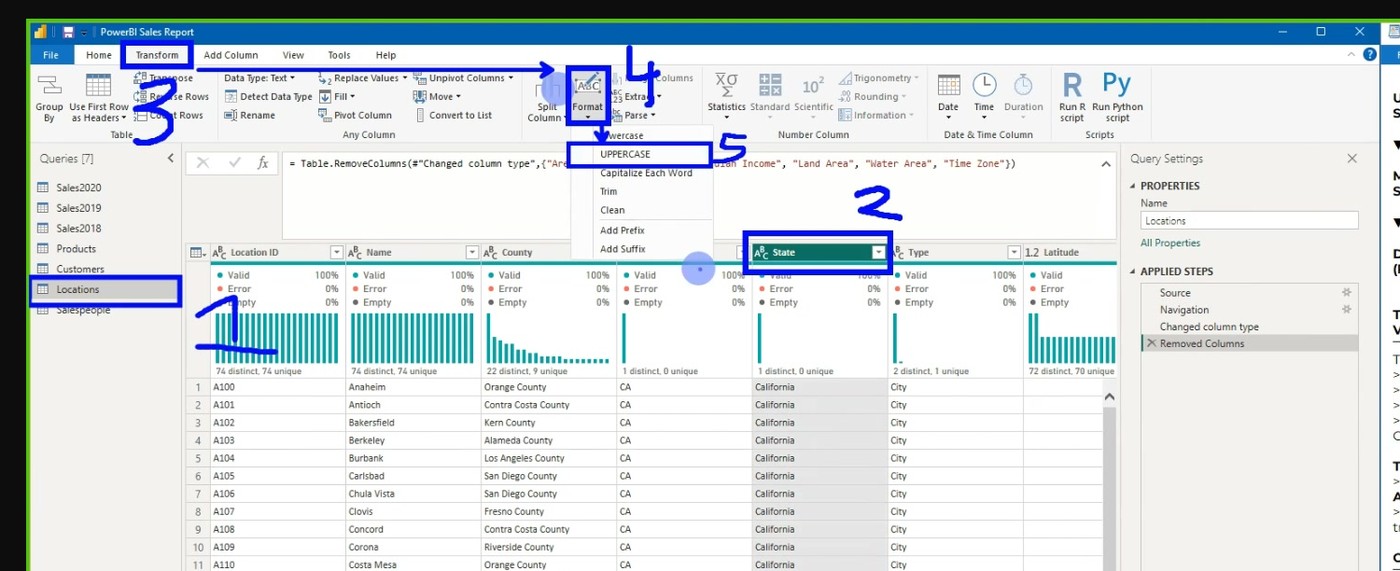 Transform > Format > UPPERCASE. The trainer's numbered marks show the
click order. The step changes the original column.
The step changes the original column. This is the Transform group.
Transform vs Add Column
Transform changes the selected column itself. Add Column creates a copy first, then changes the copy. Use Add Column when you want to keep the original column.
- Check the result. The State column now shows CALIFORNIA.
- Remove this step. You do not need it. In the Applied Steps list, delete the Uppercase step.
Step 2: Add the short-name column (correct method)
- Click the State column header.
- Click Add Column in the ribbon.
- Click Format > UPPERCASE.
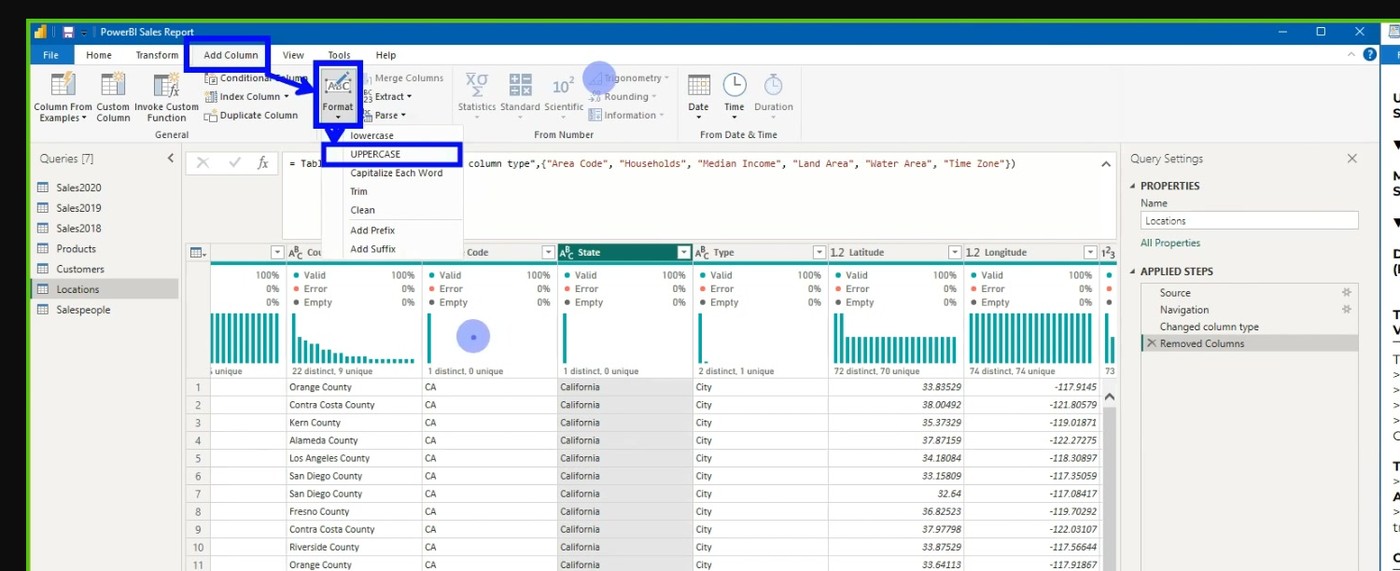 Add Column > Format > UPPERCASE. A copy column is created.
A new column appears at the right. The name is Uppercase.
Step 3: Extract the first four characters
- Keep the new column selected.
- Click Add Column > Extract > First Characters.
- Type 4 in the box.
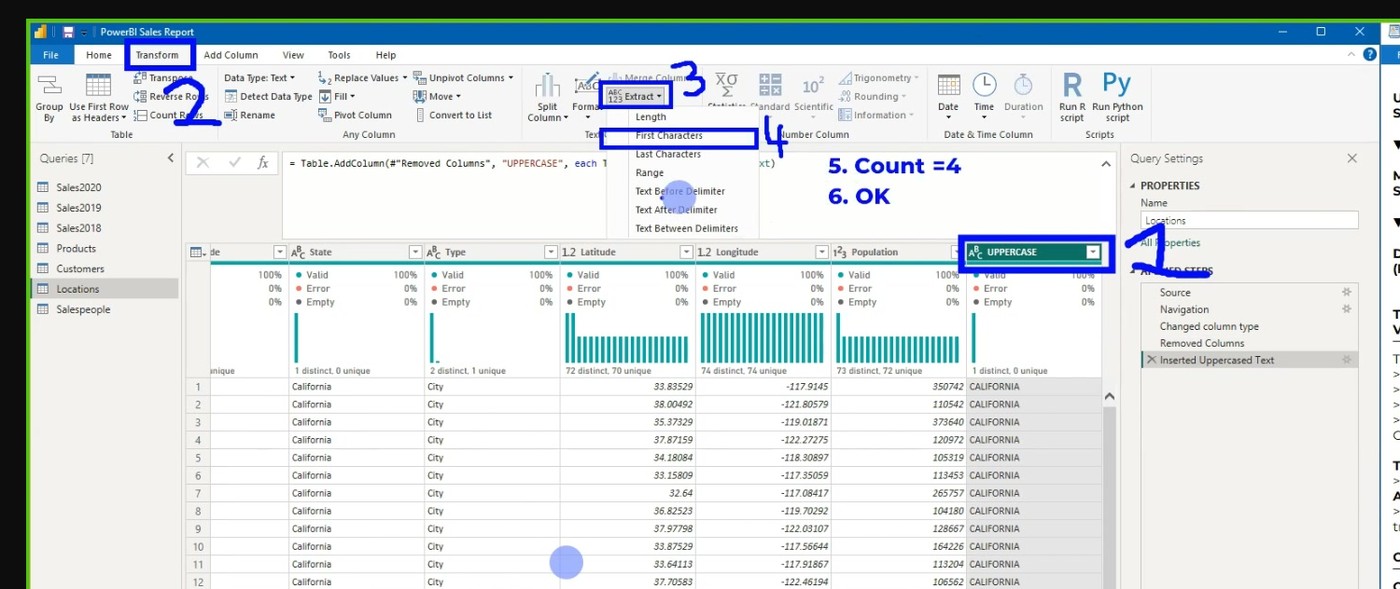 Add Column > Extract > First Characters, Count = 4.
The values become CALI, TEXA, and so on. This is the short name style.
Step 4: Rename the column
- Double-click the new column header.
- Type State Short Name.
- Press Enter.
Step 5: Move the column
- Drag the State Short Name column header.
- Drop it next to the State column.
Expected result
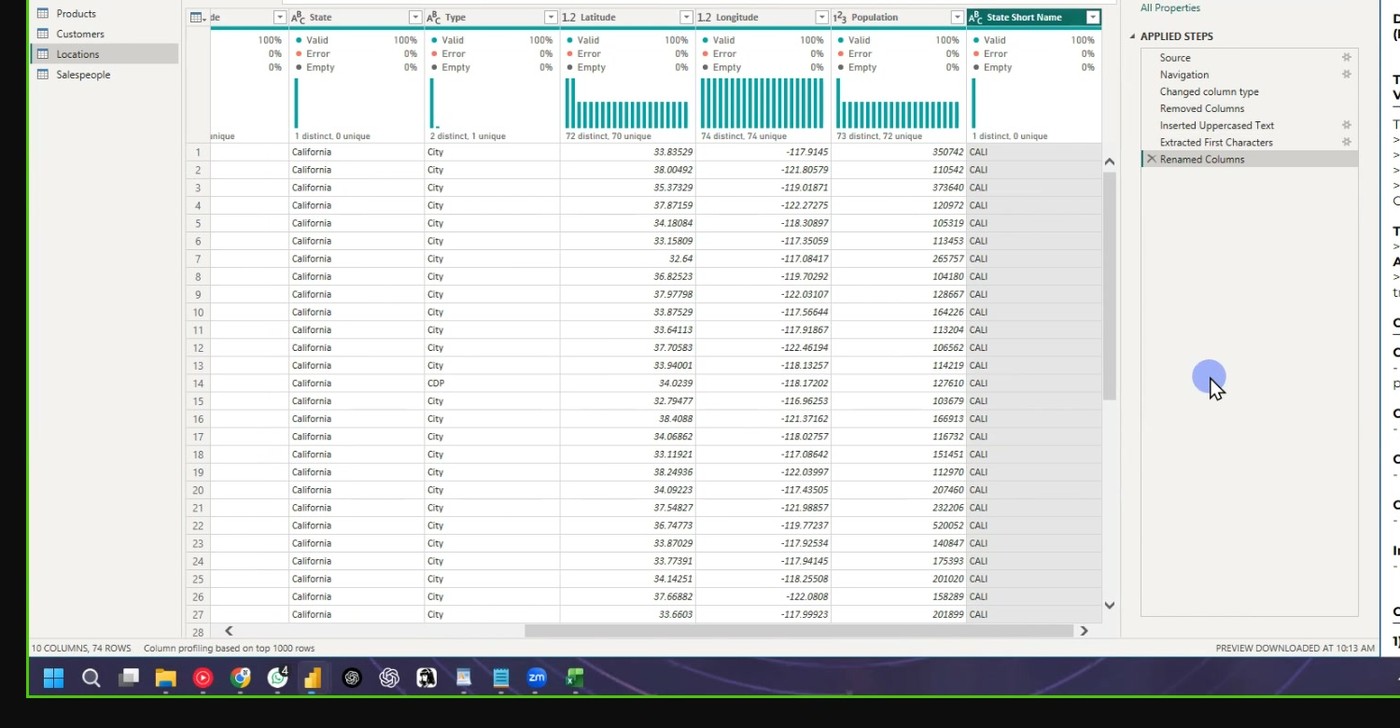 The final table: State (California) next to State Short Name (CALI).
| State | State Short Name |
|---|---|
| California | CALI |
| Texas | TEXA |
| Colorado | COLO |
Check your table against the picture. The two columns must sit side by side. The short name must show four characters in capital letters.
Next: Continue to 7. Calendar Table.